Gluten Free Recipes and DIY ideas fashioned by a Brunette.

Showing posts with label crafts. Show all posts

Friday, October 4, 2013

DIY Halloween Banner

Last year my roommates and I had a pumpkin carving party. Out guests brought their own pumpkins and we provided all carving supplies, along with yummy treats and fall cocktails! It was a ton of fun and we decided to make it an annual event! The other day I was browsing hobby lobby and came across this plain brown paper mâché banner that said "Halloween" as soon as I saw it, I thought it would look great hovering above our appetizer/cocktail table at the pumpkin carving party, but I needed to jazz it up a bit...so I did exactly that! Read below to see how I made my plain banner festive and fun!

Follow the blog to watch my pumpkin carving party come together, so that you too can have your very own pumpkin carving party for friends and family!

Supplies:
•Paper mâché banner from hobby lobby
•Light orange acrylic paint
•Extra fine copper colored glitter
•Mod Podge
•Small paint brush
•Medium paint brush
•Paper plate


Directions:
Step 1: Layout the banner across a covered surface, I covered mine with an unfolded paper grocery bag. 

Step 2: Squeeze a decent amount of your orange paint onto the paper plate, Using your medium paint brush, paint even strokes covering each of the letters, avoid painting the string that attaches the letters together. Paint as many coats as you find necessary (I did 3 coats per letter) After you complete your coats rinse your paint brush, ridding all of the paint from the bristles. 

Step 3: After the paint has completely dried on your letters (about 30 minutes) Use the small paint brush, dip it into the jar of mod Podge and paint the edges of your first letter. It's okay if it doesn't look perfectly straight! That's the point! After you finish painting the edges of your first letter, generously sprinkle the extra fine glitter where you painted the mod Podge, ensuring you don't miss any spots. Repeat this process with every letter.

Step 4: After you have finished completing step 3 on every letter, carefully pick up your banner and sprinkle all of the loose glitter off of it. Once all your loose glitter has came off, use your medium brush to paint a layer of mod Podge over each letter, sealing in all of the glitter. Let it dry for 4 hours or until mod Podge layer has dried clear.

Once your letters have dried, your banner is now ready to hang and beautifully display! 


Read More

Tuesday, October 1, 2013

DIY metallic & glitter mason jars

As lame as it sounds I love storage and organization. In my bathroom I have large glass canisters you would typically find in a kitchen for storage but I use mine to store cotton balls and the other to store Q-tips. I use these items daily for cleaning up makeup, applying toner, etc.  so it's essential that I can access them easily! I've been staring at these boring jars for awhile and decided I needed to do something different, so I took a trip to hobby lobby and purchased some new jars. I ended up finding some large, wide mouth mason jars for only $2.49 each...what a steal! But I decided to jazz my mason jars up and ended up making one metallic silver and the other dazzling with silver glitter. I love how they turned out, the jars hide my cotton balls and Q-tips but look super cute and add a touch of sparkle to my bathroom :) You could use these jars in many different ways; I find them perfect to store pocket change, makeup brushes, hair barrettes, etc. However you decide to put your dazzling jars to use... I hope you enjoy this post!


Supplies Needed: 

  • Two large, wide-mouth glass mason jar (or whichever sized mason jar you choose to use)
  • One bottle of metallic silver acrylic paint (or color of your choice)
  • One medium sized paint brush
  • One foam brush
  • Bottle of glossy mod podge
  • Silver glitter (or color of your choice)
Directions for Metallic Jar:
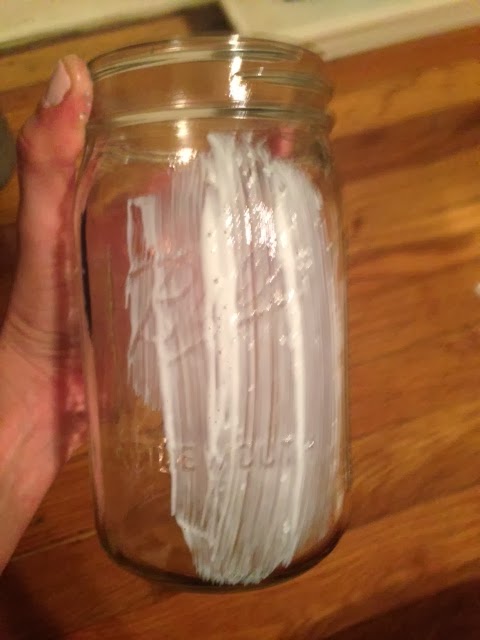
  1. Take the lid off of your jar and squeeze some paint into the bottom of the jar. 
  2. Using your paint brush, brush the paint all around the interior of the jar, coating all the sides and areas of the jar in even strokes. Look at the outside to see if you missed any spots. 
  3. Once you have completely coated the inside of the jar with paint, let the jar dry for 4 hours. 
  4. Check on your jar after the 4 hours and if you still see spots missing paint, repeat steps 1-3 again. Then your jar should be completely metallic colored and ready to use! 
  5. **If you are using your Jar to store food, you will want to spray the inside with a clear protective glaze like this one by Krylon (<-- click here)**


Directions for Glitter Jar:
  1. Using your foam brush, dip it into the mod podge and spread an even coat of mod podge all over the outside of your other jar. Be careful to not paint mod podge on the mouth of the jar!
  2. Over a covered surface take your glitter and sprinkle it all over the outside of your jar, covering all spots of the mod podge. Rinse out the mod podge from your foam brush and let it dry.
  3. Once you have completely covered the outside of your jar, let it sit for 45 minutes. After you have let it sit for 35 minutes, pick up your jar and shake off any loose glitter.
  4. After shaking off the loose glitter, take your foam brush and paint an even coat of mod podge over your layer of glitter covering all spots of glitter. After you have covered the entire outside of your jar let it sit for 4 hours or until this layer of mod podge dries clear.
  5. After you have let the outside of your jar dry clear, your layer of glitter is now sealed shut and your glitter jar is ready to use! 

Read More

Meet the Brunette Blogger...

Powered by Blogger.

© The Brunette Bible, AllRightsReserved.

Designed by ScreenWritersArena