The Brunette Bible

Gluten Free Recipes and DIY ideas fashioned by a Brunette.

Wednesday, September 16, 2015

DIY Fabulous Bar Cart Transformation

Hello everyone, I know it's been a long time since I have been on here but I have some fun stuff I need to share with you this year! Hope you enjoy reading the following about my DIY bar cart transformation!

I have been on the hunt for a fabulous bar cart but haven't been willing to shell out hundreds of dollars for one...besides aren't we supposed to spend that money on keeping the bar cart well stocked anyways? ;)  So after realizing that most bar carts cost quite a bit of money, I decided to look for a utility cart that I could transform into a fabulous bar cart. I hunted on Craigslist, scavenged through rummage sales and yard sales and I wasn't completely satisfied with any of my findings. One day my Dad & I decided to go to Harbor freight tools and we found a brand new sturdy steel utility cart, I fell in love with a 3 shelf utility cart & instantly envisioned turning it into my dream bar cart, so we bought it! The best part is, that we only paid $40.00 for it and it was brand new! All of the beat up, piece of crap carts I had been finding on Craigslist were $60.00 & up! So we purchased the utility cart and took it home to begin building it and transforming it. Read below on how you can create your very own DIY fabulous bar cart! 
Built & Transformed into this! 
Cart purchased from Harbor Freight Tools-->
Supplies: 
- 3 shelf utility cart Click here to see it!
- Sand paper, sander
- Wipes to wipe off sand residue from cart
- 2 cans of Rustoleum metallic Spray paint in "Antique Brass" Click here to buy it!
-Plastic or newspaper to cover the surface you plan on painting your bar cart on

Step 1:
Take all the pieces of the utility cart out of the box. Do not start building the cart, begin by sanding the 3 shelf pieces. Once the 3 shelves are sanded down well, spray paint the inside of the shelves. Let the shelves dry. 

Step 2: 
Assemble the utility cart together, following the instructions that are included in the box. Assemble everything except do NOT attach the side handle bar or the wheels. 

Step 3: 
Once you have completed step 2 sand down the cart, sanding off as much of the original red paint color as possible. Do not sand the inside of your freshly painted shelves. We used a wet sander to really get some of the paint off. Once it is sanded and wiped down with a wipe to remove any remaining sand residue, spray paint the entire cart. When you are spraying make sure you are using even strokes and giving the cart plenty of time to dry in between layers. Also make sure you paint the underside of your shelves! 

Step 4: 
One the cart is dry from painting it, attach the handle bar and wheels to the cart and then spray paint the handle bar and fixtures to match the rest of the cart.  Also paint the nails and screws that you used to attach the wheels so that they match the cart. Let the cart dry and air out for at least 24 hours before placing the cart in your house (the paint odor can be very strong!). Once the cart is dry, then you can begin decorating it and placing items on it! 
Now The fun part! Decorate your bar cart!

After steps 1-4 were completed, letting the cart dry and air out 


Read More

Tuesday, February 11, 2014

Easy Gluten Free Sugar Cookie Cutouts

I love sugar cookie cut outs, I think they're the perfect sweet treat for every holiday and so fun to decorate. Ever since I was a kid, my Mom would always bake up sugar cookie cut outs for my friends and I to decorate. Since having to go gluten free, I've had tried concocting several gluten free sugar cookie recipes and pre-made gluten free sugar cookie mixes but none of them are thick enough for me to make cookie cut outs with, no matter how hard I try! :( So recently I was at Whole Foods and stumbled across Pamela's Sugar Cookie Mix which is gluten free, wheat free and dairy free(depends on if you use egg & butter substitute) it was on sale for $4.99 and said "roll & cut" on the bag so I thought I would put it to the test. Turns out this mix is perfect for cookie cut outs as long as you use some all purpose gluten free flour when cutting them out! I was so excited that I just had to share!  Read below to learn how to make the perfect sugar cookie cut outs thanks to Pamela's Products! :)


Ingredients: 

  • 1 bag of Pamela's Sugar Cookie Mix
  • 8 Tablespoons of butter
  • 1 egg
  • 4 Tablespoons all purpose Gluten Free flour
  • Parchment/Wax Paper
  • Cookie cutters
  • Rolling Pin
  • Cookie Sheet Pan


Directions: 
Preheat oven to 350 degrees

Step 1:   Place 8Tbsp. butter in large mixing bowl and let it sit tip it gets to room temperature. Add Sugar Cookie mix and blend together with hand mixer. Then add egg, and blend ingredients all together.  

Step 2:  Rip 2 large pieces of parchment paper, lay one down onto flat counter surface, place 3 Tbsp. Gluten Free flour on top, and spread around. Place a handful of your dough on top of the flour covered parchment paper. Place the second piece of parchment paper on top of the dough. Roll over the parchment paper with your rolling pin to roll the dough flat. 

Step 3: Once your dough is flat, remove the top piece of parchment paper and use your cookie cut outs to cut into your dough, removing excess dough as you go. Place the cookie cut outs onto a parchment paper covered cookie sheet and bake in oven for 8-12 minutes. Repeat this step until you have used all of your dough. 

Once the cookies have baked and cooled then you can decorate them however you please! Yum! 


Read More

Monday, January 20, 2014

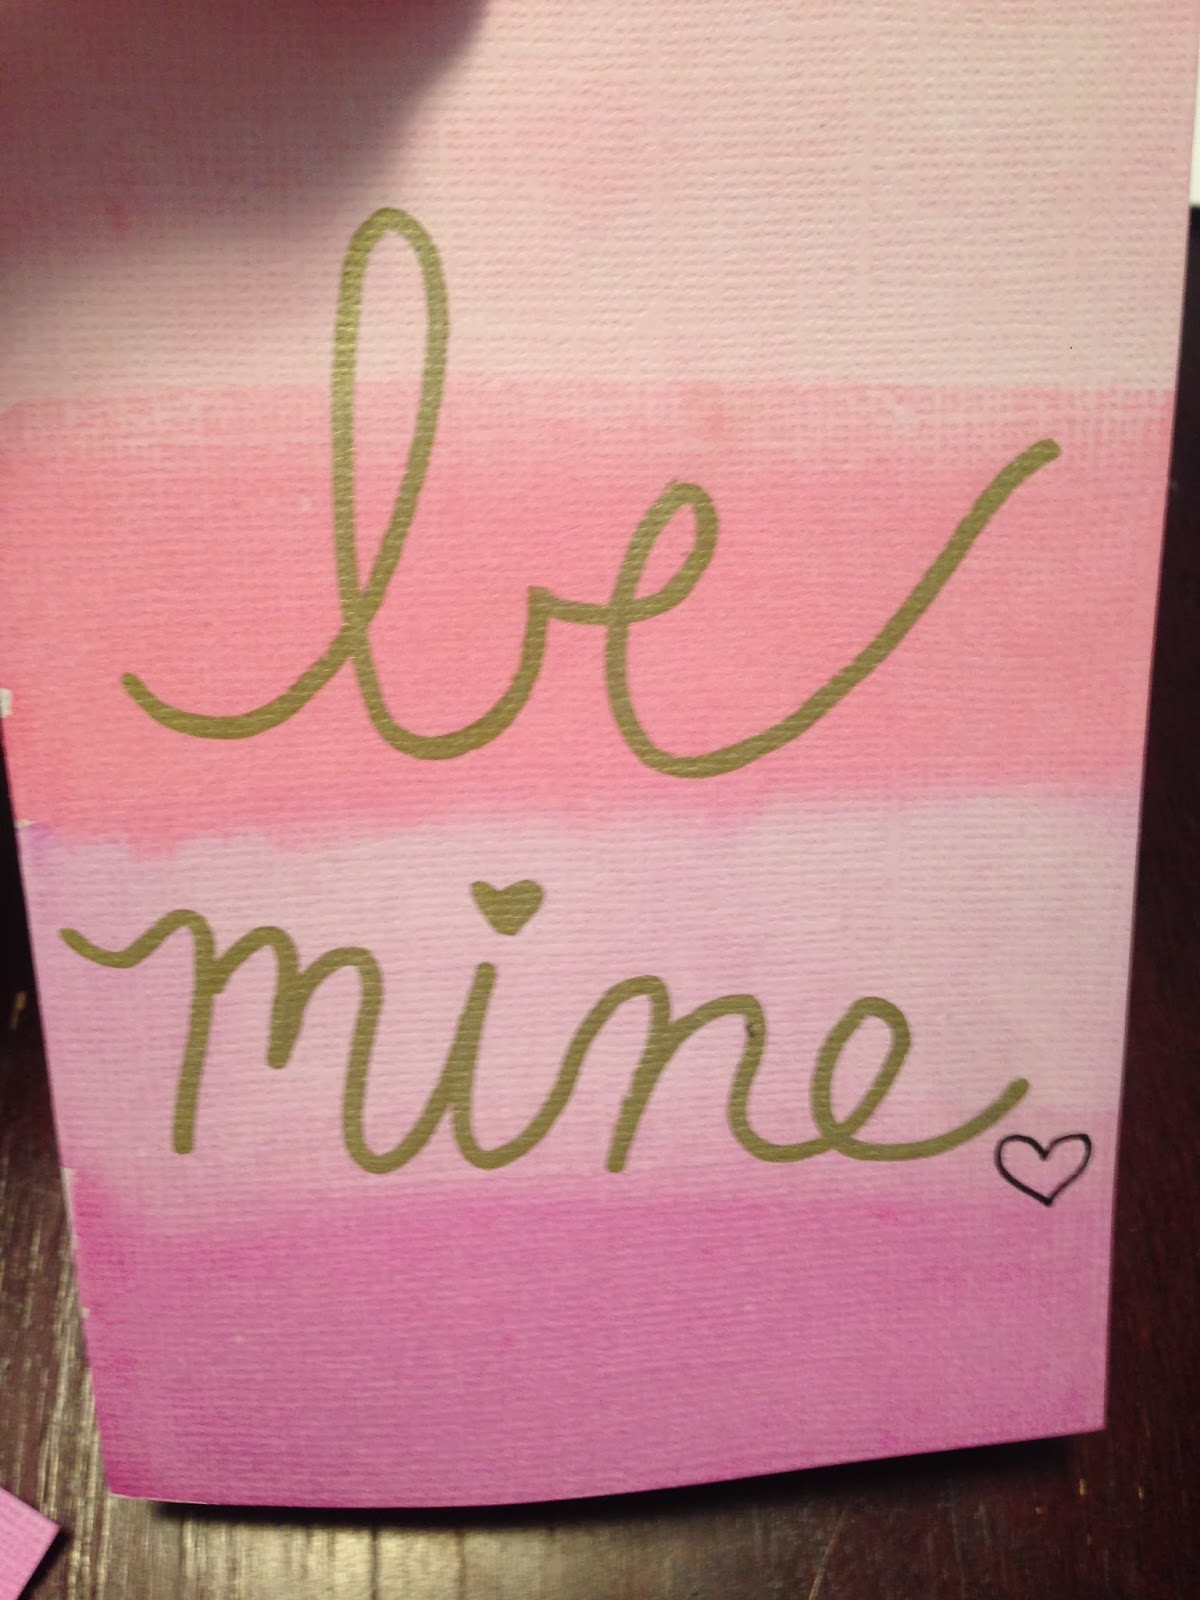
DIY Ombre Watercolor Valentines Day Cards

Valentine's Day is right around the corner & what better way to tell your close friends and family that you love them by sending a special handmade card via snail mail? I found some adorable dip dyed cards by rifle paper company but they were $8 a piece. This got me thinking how can I make my own pretty cards like rifle paper's but for less!? After perusing the craft store (Hobby Lobby) and experimenting a bit I ended up making some beautiful cards at a great price. Follow my instructions below to learn how to make your own handmade Valentines Day cards to send out! Hope you enjoy!


Supplies Needed:
  • 12 blank white textured cards
  • 12 blank matching envelopes
  • Washable Watercolor set (You don't need to buy a fancy set)
  • 1 paint brush
  • 1 black writing pen by ek tools (1 end 0.55mm & 1 end 1.2mm)
  • 1 gold writing pen by ek tools (1 end 1.0mm & 1 end 1.0mm)
  • Paper towels
  • Cup full of water 
  • Heavy books 


STEP #1:
Lay out a paper towel and place an open card face down on the paper towel. Lightly dip your paint brush in your cup of water and dip the brush into your maroon watercolor paint. Paint the bottom section of the right side of your face down card about a 1/4 way with this color. 


STEP #2:
Dip your paint brush into your cup of water and dip your brush back into the same maroon colored water color paint, making it more watery. Paint another 1/4 section right above your last painted section but ensuring that this sections color is lighter.

STEP #3:
Dip your paint brush into your cup of water, swishing it around and drying the brush with a paper fowl to remove the maroon color from the brush. Lightly dip your paint brush back into the cup of water and dip the brush into a pink colored watercolor paint. Paint another 1/4 section right above your last painted section on your card.

STEP #4:
Dip your paint brush into your cup of water and dip your brush back into the same pink colored watercolor paint, making it more watery. Paint the last 1/4 section at the top of your card but ensuring that this sections color is lighter than the previous sections. 

STEP #5:
Lightly pat your completely watercolor painted card dry with a paper towel and place it underneath a book so it will dry flat and not curl. Leave under the book for 30-45 minutes. Once the time has passed if the card still feels wet, leave it by a window so natural sunlight can dry it. Repeat this process to make more cards.
 

STEP #6:
Once your card has completely dried use your black and gold writing pens to draw a design on the face of your card. You can use your imagination to design whatever message you want for the face of your card or you can print My V-Day Card Designs  and  hold your card up to a window and trace my designs! Once you have completed the designs on the face of your card, write your very own personal message inside and mail them out! I chose to stuff heart shaped confetti in my cards before sealing them out to make them a little more fun to receive :)


Hope you enjoyed making them and I hope your loved ones enjoy receiving them! :) Happy Valentine's Day! 

Read More

Tuesday, January 7, 2014

Cleaning your Closet & Making Money From it!


With the holidays in the past and after all our spending on gifts, party outfits & more it's always nice to make some extra spending money! One of the easiest ways to make some extra cash is by cleaning out your closet and getting rid of the things you don't wear anymore and will never get around to wearing this year! It's always good to clean and organize your closet as the seasons change but why not use the new year as a point of motivation to clean out your closet?  

My Tips for Cleaning & Organizing your closet are as follows: 

Tip #1: Group together like styles! For example, in my closet on the top rack I have blouses and dresses hanging and on the bottom rack I have jeans/bottoms and sweaters/jackets hanging. 

Tip #2: Color code your closet! In my closet my top rack contains the most colors since my bottom rack has similar colored jeans/bottoms. So the top rack of my closet which houses my  blouses and dresses goes from light to dark. My blouses and dresses are stored in this exact color pattern: white>tan/nudes>pink>red>orange>yellow>green>purple>blue>brown>black. If you wear darker colors more frequently or if it is the Fall season you could always make your closet go from dark to light. 

Tip # 3: Start at one side of your closet and work your way to the other side! When cleaning and organizing your closet it is best to start at one side and work your way down to the other side of the closet. Don't get distracted and pick out random pieces or you'll end up with an even bigger mess! Start at one side of your closet and as you move down to the other side look at every piece of clothing you come across and ask yourself when was the last time you wore this piece? How long have you owned it? Does this piece still fit you? Has this piece seen better days? If you haven't worn it in the past 6 months and don't think you'll wear it for the next upcoming season then remove this item from your closet and create a pile of these items you removed! If the piece is too big or way too small, then definitely remove this piece also! If you save it out of guilt it's only going to take up space in your closet, remember that in order to make room for new pieces of clothing you purchase, you have to remove some old pieces too! 

Extra Tip: A helpful tip to gage how often you wear certain items is to hang all of your items on the opposite side of the rack and when you wear it then put the hanger on the correct side of the rack. After a substantial amount of time has gone by (5-8 months) see what items are hanging on the opposite side of your rack and say goodbye to these items because obviously you're not wearing them! 


The Best ways to get Cash for your Clothes: 

So once you have cleaned and organized your closet, it's time to take a look at your pile of items that you removed from it and see what's worth saving. If there is anything in this pile that is really worn, dirty or damaged then put this item in the trash. As for the other items here are some ways you can make some cash: 

Option #1: Sell your used items to a Used Clothing Store


If you want to make cash really quick then you can bring the items you removed from your closet to a used clothing store and see what they can offer you. Below are two different used clothing stores that are probably in your area that I like to use:

 Buffalo Exchange


I personally like to sell my items to Buffalo Exchange because it's a really quick way to get some cash or trade in your items for unique items that they are selling too! Buffalo Exchange buys your used items and after they decide what price they are going to sell your item at they give you 35% of that price in  cash or 50% of that price in trade credit. You can sell gently used clothing, shoes, handbags, jewelry, scarves, hats, and sunglasses to Buffalo Exchange and they even take Men's used items too! 
Click Here to learn more about Buffalo Exchange & find a location near you!

Plato's Closet

I only go to Plato's Closet to make quick cash by selling my used items, I don't trade at Plato's. I think that the items Plato's has are not as good of quality in comparison to Buffalo Exchanges items and the items are much younger looking than Buffalo Exchanges, Plato's closet targets teenagers and twenty-somethings. Plato's Closet assesses your used items and then the buyer will make you an offer for how much cash or trade they can give you for all your used items and then you can decide on whether or not you want to accept the offer. You can sell gently used clothing, shoes, handbags and accessories to Plato's Closet! 
Click Here to learn more about Plato's Closet & find a location near you! 


Option #2: Sell your Used items on Phone Apps/Online: 

If you can invest a little more time into selling your used items than I suggest you use one of these apps below to sell your items. It's totally worth it in the end because you get to decide the price at what you want to sell your items at and you can shop tons of other women's closets! Below are two apps I use to sell my used items: 

Threadflip

I use Threadflip to sell my used clothing, handbags and jewelry. Threadflip is an app on you can access on your iPhone, iPad or computer! It's really easy to create a profile and upload the items you want to sell. You choose the price that you want to sell your items for and Threadflip keeps 20% of the profit. You have the option of charging your buyers for a shipping label if they buy from you or choosing to pay for the shipping yourself, you must include a tracking number for the shipment though Threadflip gives you the option of having your profits mailed to you via check  or paying you via PayPal, you can also use your profits towards future purchases from the site. 
    • PROS: I find Threadflip to be more user friendly, I love the option of not charging buyers for shipping, Threadflip e-mails discounts/coupons and credits towards purchases regularly which motivates users to buy! 
    • CONS: If you don't have a PayPal account having a check mailed does take a lot longer to have your cash sent to you.
    • Click Here to learn more about Threadflip!

Poshmark

I use Poshmark to sell my used clothing, handbags and jewelry. Poshmark is an app you can use on your iPhone or iPad to sell your closet and shop other women's too and works very similar to Threadflip! Creating a profile through Poshmark is also really easy,  you choose the price that you want to sell your items for and Poshmark users can comment on your listings and like them. Poshmark keeps 20% of your profit and charges the buyer for shipping, once one of your items sell you'll get a shipping label e-mailed to you that you can tape on your boxed up item and schedule USPS to pick up for you. Poshmark gives you the option of having your profits deposited into your bank account or using the profits towards future purchases from the site. 
    • PROS: Once you make a profit you can have your profit deposited into your account very quickly. 
    • CONS: Poshmark doesn't send users discounts or credits often, shipping is a bit overpriced, they have "parties" which require you to be available during certain times to share your postings that fit these parties themes-it's great because your items get noticed but if you are busy like me it's hard to be able to participate in these parties. 
    • Click Here to learn more about Poshmark!

Whichever option you utilize, I hope that you have luck selling your fashionable used items! :) 
Read More

Monday, December 2, 2013

DIY Brown Paper Wrapping Ideas

I cannot believe Christmas is so soon! This year I decided to get a little more creative with my gift wrapping but in an inexpensive way. I went to the dollar store and purchased plain brown wrapping paper and jazzed up each of my brown paper boxes with festive tie ons.Read below to learn how to make 3 different gift wrapping tie ons that I added to my brown boxes! Hope you enjoy! :)


Holly Berry Gift Wrap Tie On 


Supplies Needed:
  • Ivory Yarn
  • Large Gold Jingle Bells (I bought mine from Dollar Tree) 
  • Fake Holly florals (I bought mine from Dollar Tree)
  • Hot Glue gun
  • Blank Circle cardstock Tags
Directions:
Step 1: Wrap your gift in your brown wrapping paper. Cut a piece of yarn long enough to wrap around your box 4-5 times.

Step 2: String a jingle bell onto the very end of the piece of yarn, then string your circle tag (with the filled out name written on it). Wrap your yarn around the box until both ends meet in the middle of your box. [see photo below]

Step 3: Cut a piece of holly from your fake floral piece, place one of the holly leaves above the yarn and one leaf under the yarn so it lays flat on your wrapping paper, placing the leaves in the middle of your box near the loose ends of the yarn. Carefully hot glue down the leaf laying flat on your wrapping paper. [see photo below]

Step 4: Take your ends of the yarn and tie the bell & tag directly next to your holly leaves. Double knot your yarn so it is secure and cut any loose ends. Your tie on is now complete!

<---Step 2                                                Step 3--->


Cinnamon Stick Gift Wrap Tie-On


Supplies Needed:
  • Ivory Yarn
  • Cinnamon Sticks (I bought a bag for $1 at Hobby Lobby)
  • Large Gold Jingle Bell
  • Hot Glue Gun
  • Blank Circle Card stock Tags
Directions:
Step 1: Cut a piece of yarn long enough to wrap around your box 4-5 times. 

Step 2: String a jingle bell onto the very end of the piece of yarn, then string your circle tag (with the filled out name written on it). Wrap your yarn around the box until both ends meet in the middle of your box. [see photo below]

Step 3: Take two cinnamon sticks and hot glue them together, then glue them flat onto your wrapping paper in the middle of your box placing the sticks on top of your yarn but leaving the loose ends of the yarn out.  [see photos below]

Step 4: Take your ends of the yarn and tie the bell & tag directly on top of your glued down cinnamon sticks. Double your yarn so the bell and tag are secure. Yay! 


Pom-Pom Tie-On


Supplies Needed:

  • Ivory Yarn
  • Tinsel Green & Red colored poms poms of various sizes
  • Embroidery needle
  • Tape
Directions:
Step 1: Cut a piece of yarn long enough to wrap around your box 4-5 times (depending on size of the box) 

Step 2: Thread one end of your yarn into the embroidery needle about an 1.5 inches down, fold over the yarn. [see photo below]

Step 3: Pierce poms-poms with your embroidery needle and string them down to the end of your yarn, continue to string pom-poms until you have a good amount on your string. [see photos below]

Step 4: Remove your needle and tape that end of the yarn to the back of the box. Roll your yarn to the front of the box and move the pom-poms along your string of yarn to have some on top of your box, spacing the pom-poms apart. [see photo below]

Step 5: After you have completed a row of pom-poms on top of your box wrap the yarn to the back of the box, then wrap the yarn around to the front of the box and move your pom-poms along the string of yarn to the top of your box again. Repeat this step until you have enough rows of pom-poms covering the front of your box. Once you're done covering the front of the box with the pom-poms, tuck the end of the yarn on the back of the box and tape it down. Yay!  [see photos below]


Read More

Monday, November 25, 2013

DIY Fall Votive Mason Jars- A Thanksgiving Centerpiece

I love mason jars! They are perfect as candle votive holders and placing a few jars together makes a perfect table centerpiece. Below I show you how to create a Fall look with your mason jars that can be used as a simple and elegant centerpiece for your Thanksgiving table. Hope you enjoy!

DIY Fall Votive Mason Jars


 Supplies Needed:

  • 3 mason jars (I bought mine at Dollar Tree)
  • 3 ivory votive candles
  • Brown Spanish Moss
  • Ivory Twine
  • Fake floral berries (I found mine on the arrangements that my fall leaves from above were on) 


Directions:
  1. Unscrew the lids off your mason jars, remove the center canning parts and keep only the rim to screw back onto the top of your jar. 
  2. Cut three sections of berries 1.5-2 inches long from your floral arrangement. Cut three pieces of 3-4 feet of twine. 
  3. Make sure your lids are off your jar and grab a handful of spanish moss and stuff it into each one of your jars. In the center of the moss, burrow a small hole where you can put your votive candle so it will sit up straight and evenly.
  4. Once all jars have moss and votive candles situated in them, screw your lids (without the center) back onto the jars. Grab one piece of twine and wrap it around the gold rim of your mason jar holding one edge of the twine in your hand, after you have wrapped it around where now the other edge of the twine meets, tie a loose knot with 1 inch of space between your knot and the lid of the jar. 
  5. Place one section of berries into the space between the jar lid and knot. Now grab the ends of your knot, pulling the berries onto the jar lid very tightly. Tie another knot so the berries are securely fastened to the jar lid. Cut any remaining ends of the knot. Repeat with remaining jars. 
  6. Once all jars have berries and twine fastened to them,  light your candles and place jars where desired to enjoy! :) 
Pictured below: 1-burrowed moss with votive candle in it,  2-berries left on fall arrangement that I cut into sections to use, 3- completed fall votive mason jar 


Read More

Meet the Brunette Blogger...

Powered by Blogger.

© The Brunette Bible, AllRightsReserved.

Designed by ScreenWritersArena